

This tutorial will guide you to know how to lock a file or folder with OSX with an easy and quick tip. First, you should choose files and/or folders to lock up. You should know that this tip is a simple way to lock a file. Sincerely, this is not the strongest way to lock up a file because this way will protect the files and folders from wrong actions, but not from non authorized users views. It means that the file or folder is really locked but anyone could look into it. This protection is not about privacy.
Lock any file or folder in your Mac OSX
Anyway, it is important to know that you could lock your files and/or folders doing this simple tip. Do follow these steps:
1.- Select file or folder to lock to. For this tutorial, I will drop my chosen file on my Mac’s desktop. Look at the following picture, chosen file for this example is an image type one (don`t care about kind of files).
.

.
At the upside picture, you could see a section of my Mac’s desktop with my chosen file prepared to be locked up with OSX.
2.- Open file or folder’s Information dialog box by pressing down the shortcut ‘Command+i’ keys. You could also get the same result by right-clicking on the file/folder icon/name and choosing “Get Info” from listed options. At next picture you will see the file/folder info dialog box to get to:
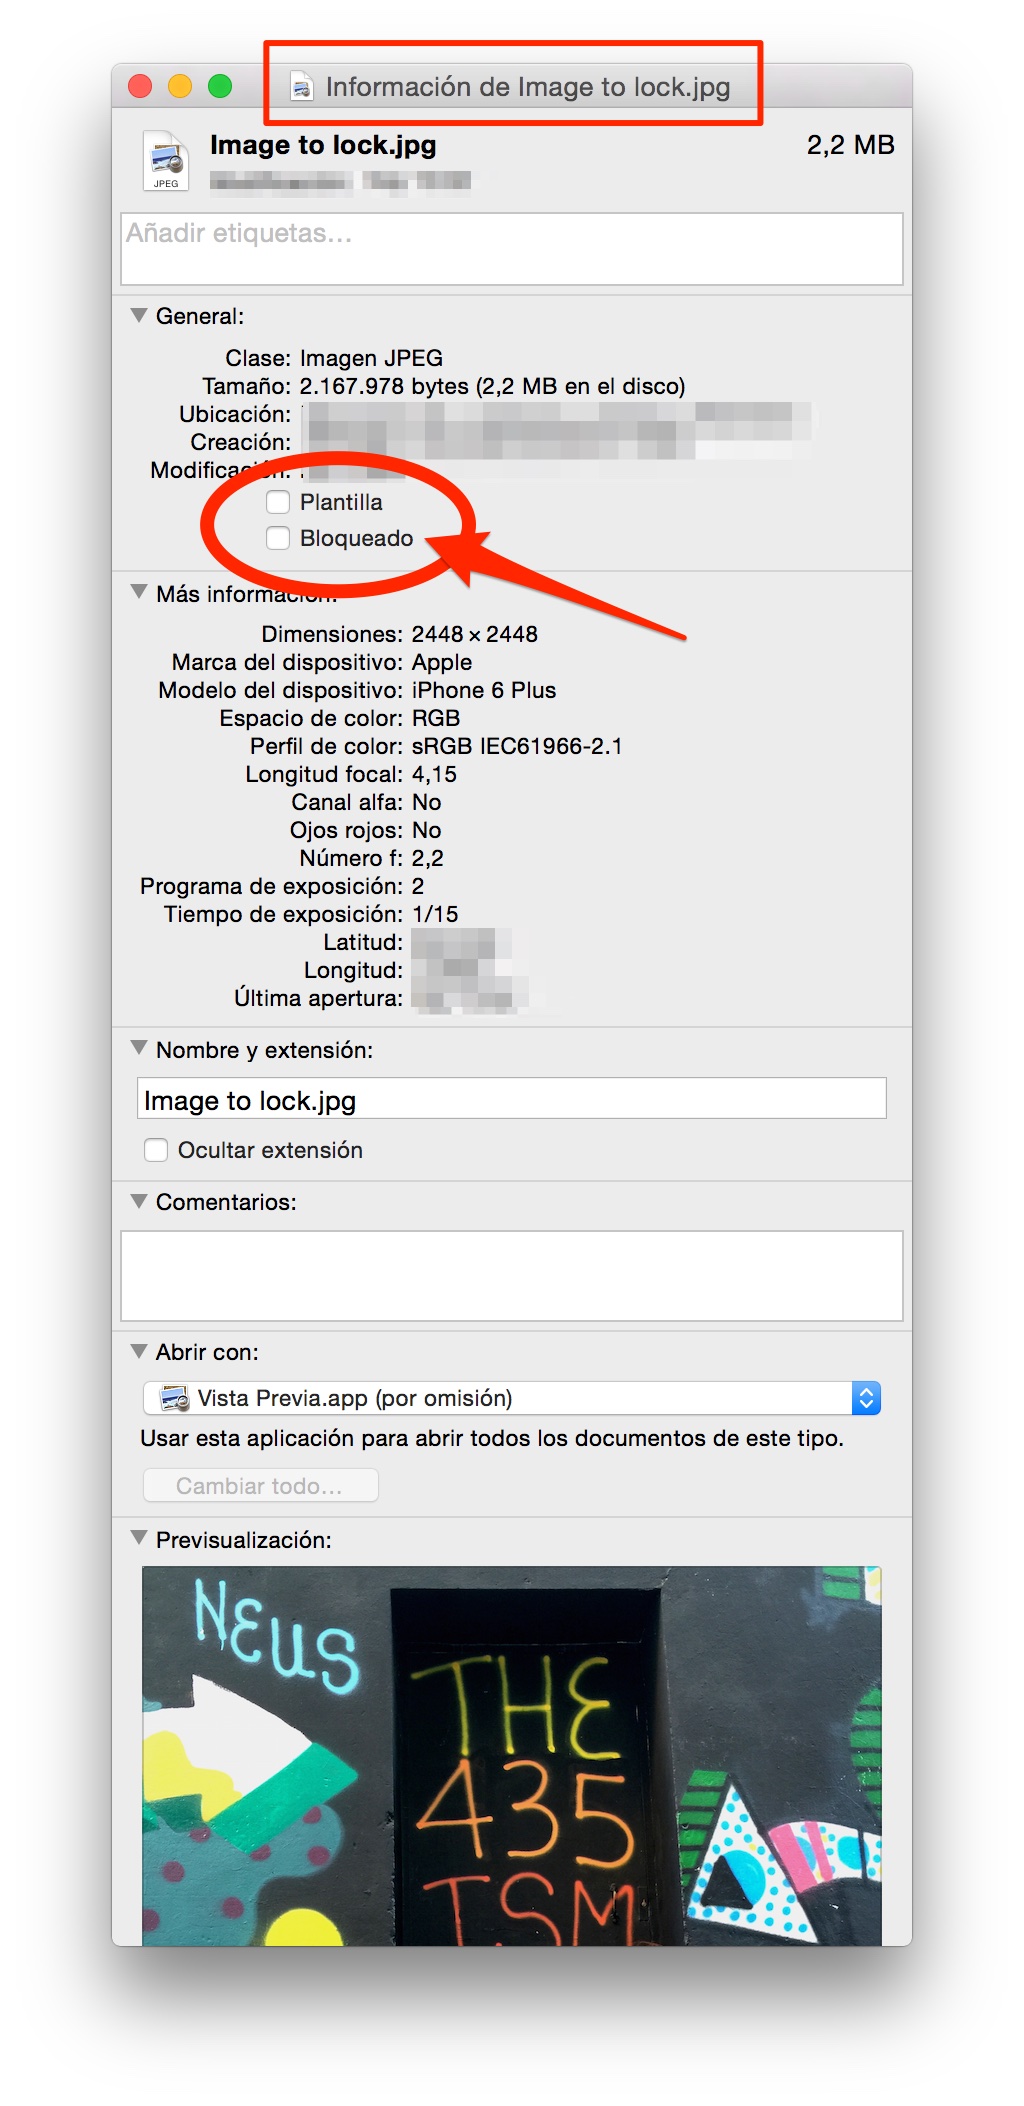
At the picture upside you could see all information about that file. If you fix your look inside red circle you will see the available ‘lock’ option. You can ‘tic’ (activate) that check-box by clicking in it. Is it already done? well, now your file or folder is just locked by OSX.

Look at the picture upside to check how the file or folder get locked in the information dialog box view. Be careful because that sort of protection will avoid your files/folders from wrong actions or modifications, but the file or folder contents could be shown up to anyone. Privacy is not protected.
Now, your locked file or folder will show you up a small padlock at the bottom corner of its own icon. This means that the file or folder is now locked. Look at next picture:
.

.
Once your files or folders are locked up by OSX, these files and folders will not be removed or modified by anyone because OSX will show you an alert box if you or anyone try to do it. Anyway remember that this is not a strong file or folder protection. Take care about actions on this sort of locked files or folders.
.
3.- If you want to unlock the file or folder, you should undo the ‘tic’ (checked-box) verification at the ‘lock’ area in the file’s information dialog box. You could unlock it by clicking again at the ‘locked’ check-box and keeping it like before starting. Look at next picture.

That’s all. For the next tutorial I will guide you to protect and lock files and folders by password. In this case, privacy will be the main issue to keep on. Another users must know your password to look into your folders/files. See you!!


